Fix: Screen Upside Down
Windows comes with a prepacked feature where you can rotate the screen at different angles. There are also keyboard shortcuts which help facilitate this feature. However, even though how useful this feature might be, there are numerous occasions where users find their screen rotated even when they didn’t do anything or change any setting.
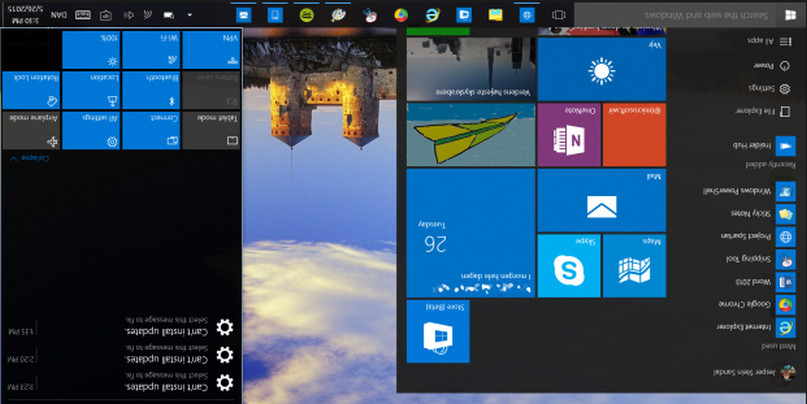
It is possible that you accidentally pressed the shortcut on the keyboard or some other application changed the setting on your computer. The fixes for this problem are quite simple and require little to no effort. Take a look below.
Solution 1: Using hotkeys
Like mentioned above, Windows have hot-keys present in the UI which changes the orientation of the display. First, we will make sure that these hot-keys are enabled and if they are, we will use the keyboard shortcut to change the orientation.
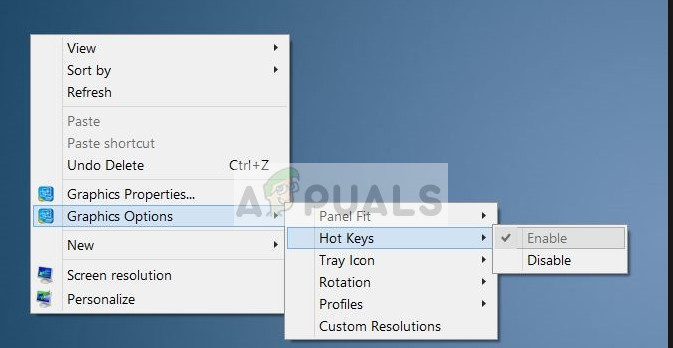
- Right-click anywhere on your Desktop and select Graphic options.
- Select Hot Keys > Enable. Once you have made sure that the hotkeys are enabled, press Ctrl + Alt + Up arrow to change the orientation of the screen. You can also use Ctrl + Alt + Right or Left or Down to change the direction the other way.
Solution 2: Using Graphics Properties
If you are using Intel HD Graphics, you will probably see the option Graphics Properties whenever you right-click on your Desktop. This option contains all the properties of the graphics driver and helps you change the configurations and control several options (such as refresh rate, resolution, color- depth etc.). We will navigate into these options and see if the orientation is changed in these properties.
- Right-click anywhere on your Desktop and select Graphics Properties or Intel Graphics Settings.

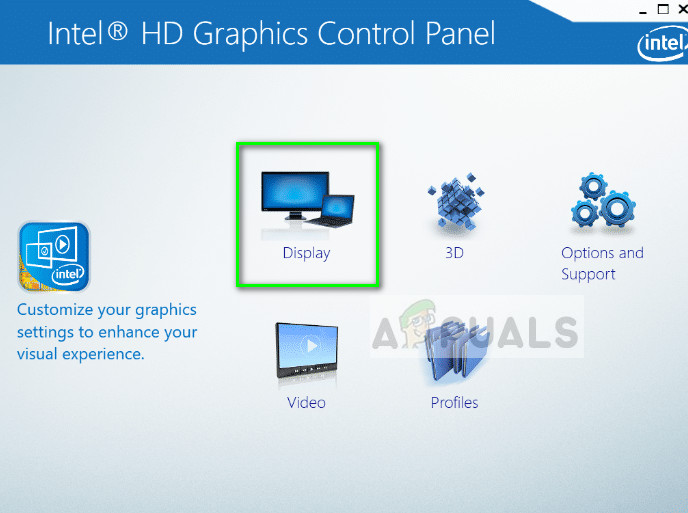
- Now select Display from the list of sub-options which come forth.
- Now under the options of “Display settings”, you will see the rotation of the screen. Make sure that the slider is set to 0.
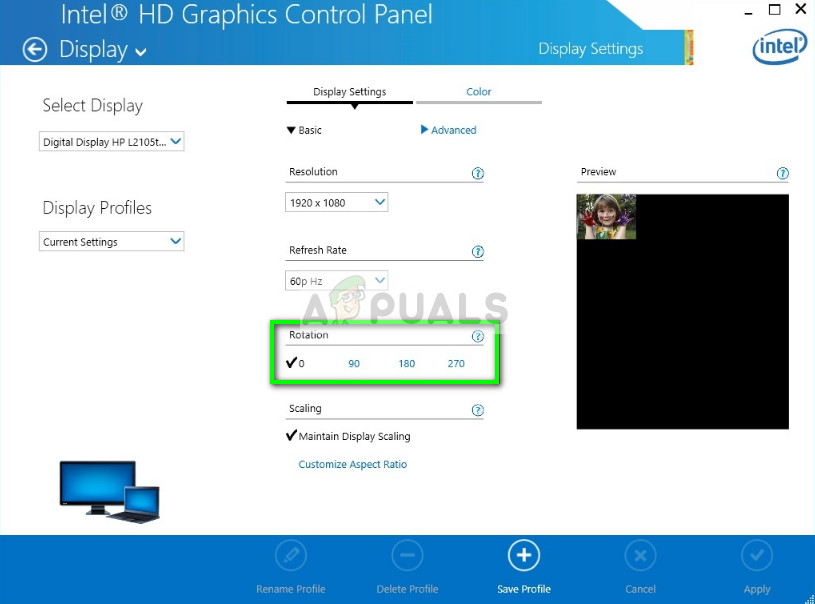
- Press Apply to save changes and exit. The orientation of the screen should change automatically.
Solution 3: Using Windows Display Settings
Windows Settings also have a section to manage the display settings of your computer. These displays settings help control the resolution of your computer’s display without any hassle. It is possible that the settings are changed from there and this is the reason you see your screen turned upside down.
- Press Windows + S, type “settings” in the dialogue box and open the application.
- Once in the settings, click on System, click on Display using the left navigation bar, scroll to the end and select Advanced display settings.

- Once in advanced display settings, click on Display adapter properties and click Intel HD Graphics control panel.
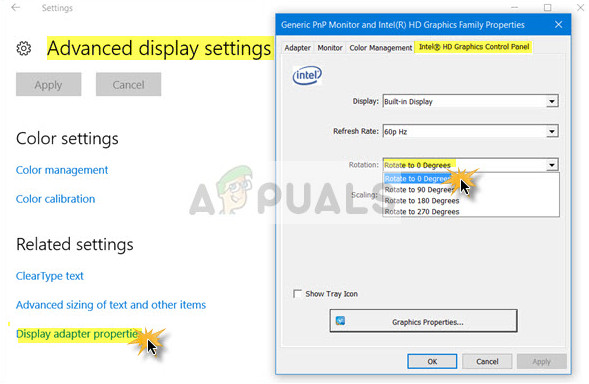
- Change the rotation to Rotate to 0 Degrees. The display should automatically revert back to the original form.
Solution 4: Checking your monitor’s physical controls
Some monitors have buttons which enable the user to shift the screen’s rotation to 90 degrees. Which you may not know of this option on your computer, you might have clicked it by mistake and caused your screen to rotate. Check for any physical buttons present on the side and if a menu opens up, navigate down the options and see if there are any options for the rotation.
You can also google your monitor’s model and see if the feature is present. The monitor’s user manual may also contain details regarding the rotation option. Troubleshoot yourself and if there is an option present, change to default (0 degrees). Also, make sure that the monitor is placed correctly. Even though it is meaningless to say, some people reported that they installed their monitor upside down.
Solution 5: Updating Graphics Drivers
If neither of the solutions are working, it is possible that the graphics drivers are outdated or corrupt. This might cause the display to go into an unresponsive state and reject the change in settings you make using the applications. Once you update the graphics, the rotation will automatically return to the normal state.
- Press Windows + R, type “devmgmt.msc” in the dialogue box and press Enter. Once here, click on Display adapters, right-click on your hardware and select Uninstall.
- Boot your computer into normal mode, press Windows + R, type “devmgmt.msc” in the dialogue box and press Enter. Most probably the default drivers will be installed. If not, right-click on any empty space and select “Scan for hardware changes”.
This step will install the default drivers on your computer. Restart your computer and see if the rotation gets fixed. If it doesn’t, you can follow the methods listed above to fix it. If even then it doesn’t, you can update the driver using the method listed below.
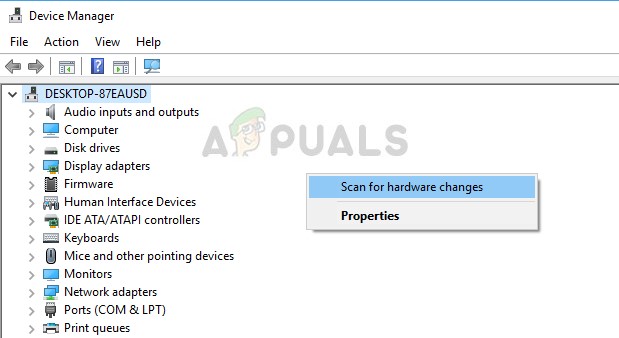
- Now there are two options. Either you can search online for the latest/older driver available for your hardware from the manufacturer’s website such as NVIDIA etc. (and install manually) or you can let Windows install the latest version itself (search for updates automatically).
- We will take a look at installing automatically. Right-click on your hardware and select “Update driver”. Select the first option “Search automatically for updated driver software”.
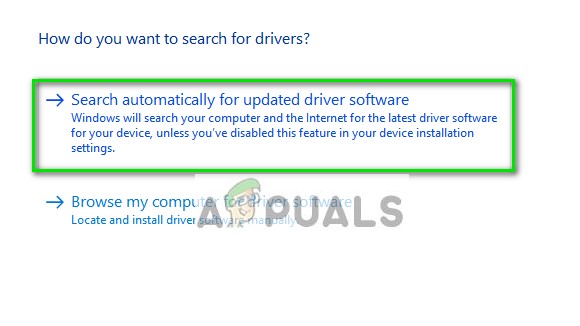
- Let the update install the necessary files and restart your computer. Hopefully, the rotation problem will be fixed.
Tip: You can also run Windows Update from Settings and try checking for any updates available for your computer.
The post Fix: Screen Upside Down appeared first on Appuals.com.


No comments