How to Fix Unknown Hard Error on Windows 7, 8 and 10
The “Unknown Hard Error” pop-up is an annoying one as it often appears while you are running a video game or any other intensive process on your computer and you may find that it occurs along with a process such as “explorer.exe”, sihost.exe or ctfmon.exe.
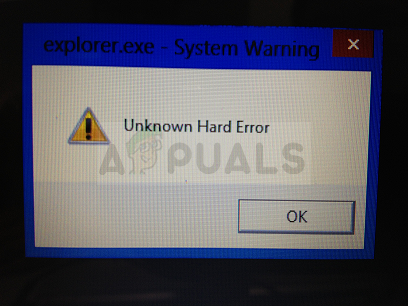
Usually, the System Warning: Unknown Hard Error is triggered by corrupted system’s files or registry entries and it leads to a black screen, taskbar freezing, and disappearance of desktop icons. Follow the instructions we have prepared in this article in order to find out more about how to fix the problem.
Solution 1: Try an SFC Scan
Even though the SFC scan barely manages to fix any real issues (but Microsoft staff recommends it for virtually anything), this time it appears that this particular problem can be solved via this built-in Windows tool.
You should use the SFC.exe (System File Checker) tool which can be accessed via the administrative Command Prompt on your computer. The tool will scan your Windows system files for broken or missing files and it’s able to fix or replace the files instantly. This makes sense as we have already suggested that the error might by caused by faulty or missing system files.
If you want to take a look at detailed instructions on how to use and run this tool, check out our article on the topic: How to: Run SFC Scan in Windows 10.
Solution 2: Run a Repair on Your System Partition
Luckily, Windows comes armed when it comes to various tools, utilities, and troubleshooters which can be used to solve some problems. A particularly useful one in this situation would be the tool which can be used to scan and solve problems on your hard disk and it can be accessed quite easily if you are using an account with administrative privileges. Follow the steps below.
- Open This PC on Windows 8 or Windows 10 or My Computer on older ones depending on the version of Windows you have installed.
- You can get there by opening your Windows Explorer interface by clicking the Libraries icon or by opening any folderand clicking on This PC/My Computer at the left side navigation pane.
- Right-click on the drive or partition where your operating system is currently installed (Local Disk C by default) and click on the Properties option. In the Properties window, switch to the Tools tab and click on Check under the Error checking section.
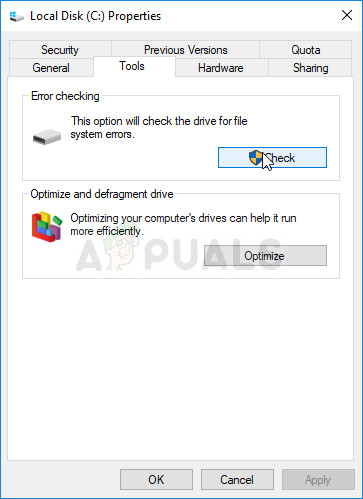
- Follow the instructions and prompts which will appear on screen in order to progress and be patient for the tool to scan your hard drive as it will definitely take a while. Restart your computer afterwards and check to see if the “Unknown hard error” pop-up still appears on your computer.
Solution 3: Use a Different Account on Your Computer
This error can also appear if your current user account has malfunctioned. In these cases, the “Unknown hard error” is usually attached to the explorer.exe process and it usually appears on startup. Switching to a different account should be an easy process and you can easily share the old files you have created.
Windows 10 Users:
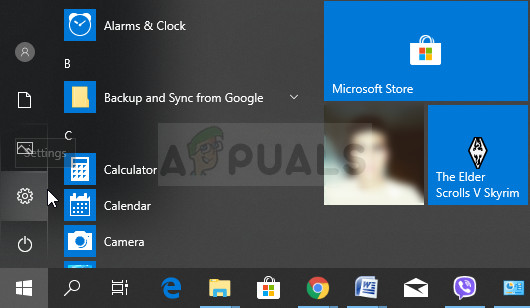
- Open Settings on Windows 10 either by clicking on the gear icon which can be found above the power button in the Start menu’s creen or by searching for it in the search bar next to the Start menu.
- Open the Accounts section in Settings and click on Family & other people. Choose the Add someone else to this PC option located there and for everything to load properly.
- If you plan on using another Microsoft email to sign in, you can enter it under Email or phone and proceed by setting up the password and other stuff. If you want to use a regular account not connected to Microsoft, click on “I don’t have this person’s sign-in information” and then “Add a user without a Microsoft account”. Now you can setup security credentials.
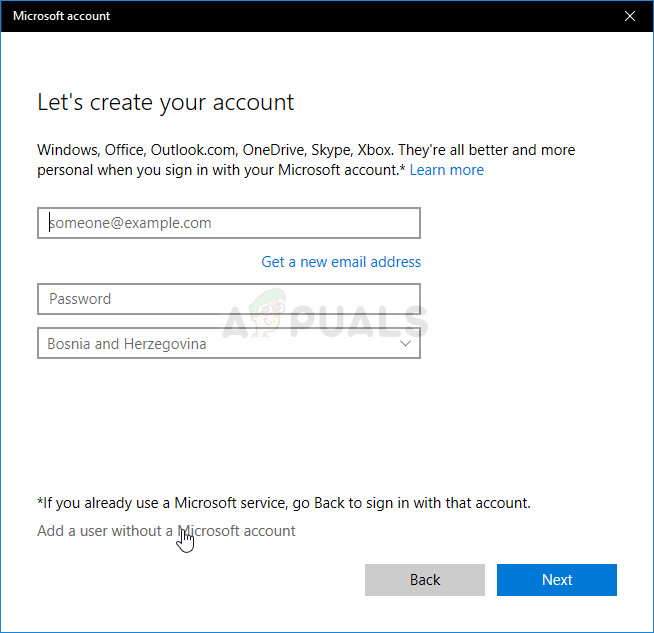
- If you want this account to be password-protected, you can add a character password, a password hint, and proceed by clicking Next. You can set it up now or later, when you have seen that the method works.
- Click the Finish button in order to finish creating a new account. Login via this account by either restarting your computer or by clicking the Start menu >> Account icon >> Sign out. Check to see if the problem is gone.
Older Versions of Windows:
- Make sure you are logged in with an admin account on your computer as you won’t be able to add new users using any other account.
- Click on the Start menu button or the search bar next to it and open Control Panel by searching for it. In Control Panel, change the “View as:” settings at the top right part of the window to Category and click on User Accounts.
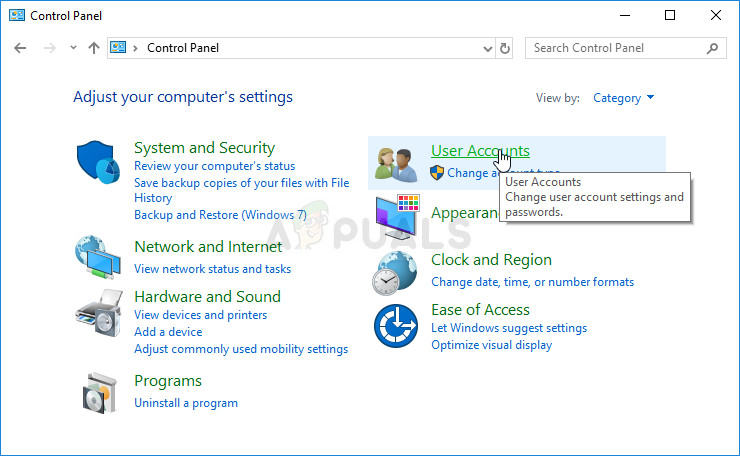
- Click on User Accounts again and click the Manage another account option with the administrator shield next to it. You also might see the Add or remove user accounts option instead of this one or under User Accounts in Control Panel.
- In the Manage accounts window, click on Create a new account, type in the New account’s name in the respective window, and choose the Administrator radio button as you probably want to have admin permissions on your new account.
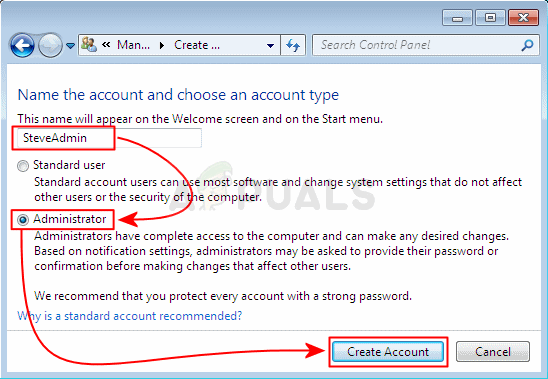
- You should see the Create Account button when you have finished setting up all needed settings so click on it and you should see it in the list of account in the Manage Accounts window. Log off Windows and try logging into your new account to see if the problem is gone.
Solution 4: Update Windows to the Latest Version
The “Unknown hard error” related to the sihost.exe process has bugged users when a new update for Windows came out and they were desperate for a solution. Unfortunately, no methods have worked until Microsoft has decided to release a patch. However, some users also had problems with the updating functionality so we will present a useful method for them as well.
- Use the Windows Logo Key + I key combination to open Settings on your Windows PC. Alternatively, you can search for “Settings” in Start menu or the search bar.
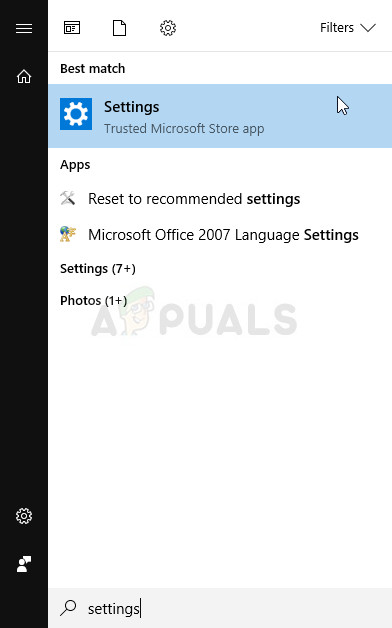
- Locate and click on the “Update & security” sub-section in the Settings app.
- Stay in the Windows Update tab and click on the Check for updates button under the Update status section in order to check whether there is a new build of Windows available.
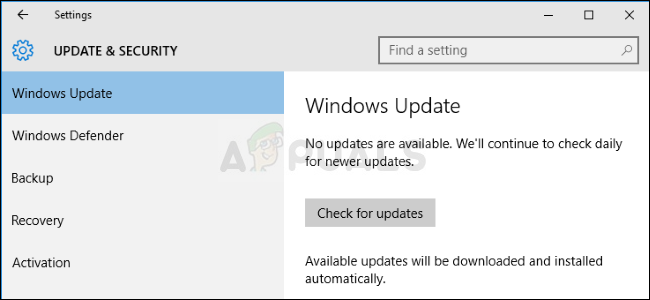
- If an update to a new build is available, Windows should start with the downloading and preparing process immediately and the update should be installed as soon as you are available to do a restart.
If you are using another version of Windows or if Windows 10 is having problems in the Settings app, it should be important to state that the automatic updating process can be easily disabled and you may have done so unwillingly or willingly. Either way, a simple command may be able to install the latest updates on any version of Windows.
- Open the PowerShell tool by right-clicking the Start menu button and clicking on the Windows PowerShell (Admin) option at the context menu. Windows 7 users can just search for it.
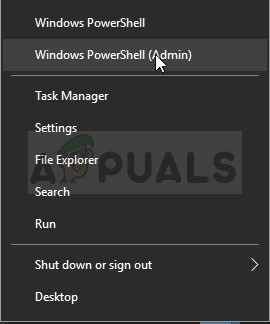
- If you see Command Prompt instead of PowerShell at that spot, you can also search for it in the Start menu or the search bar next to it. This time, make sure you right-click on the first result and choose Run as administrator.
- In the Powershell console, type in “cmd” and stay patient for Powershell to switch to the cmd-like environment. In the “cmd”-like console, enter the command shown below and make sure you click Enter afterwards:
wuauclt.exe /updatenow
- Let this command do its thing for at least an hour and check back to see if any updates were found and installed. This method can be applied to all Windows operating systems, including Windows 10.
Solution 5: System Restore
Even though that System Restore sounds like a lengthy and costly process, it will just revert your PC to a state where it was in before the error started to occur and that appears to have solved the problem for many users. The process is actually quite easy to perform if your computer has configured to save restore points.
- Search for the System Restore tool using the Search button next to the Start menu and click on Create a restore point. In the System Properties window, click on System Restore.
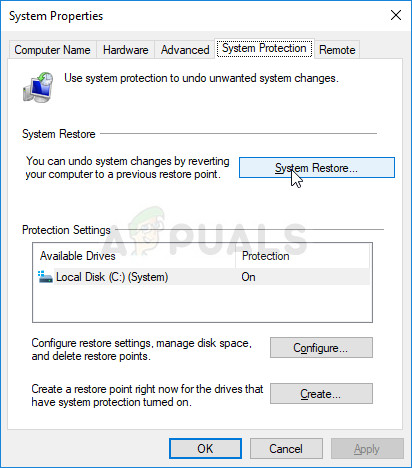
- Inside the System Restore settings window, select the option named Choose a different restore point and click the Next button.
- Select a particular restore point your computer saved before. You can also select any restore point available on the list and hit the Next button to select it and restore the PC to that point in time. Make sure you choose the one before the error started to occur on your PC.
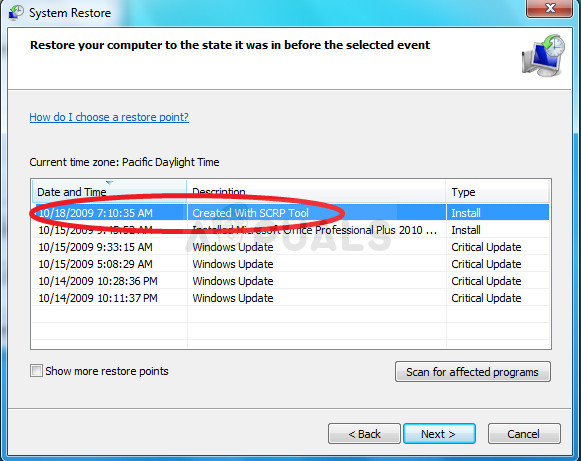
- After the process is over, you will be reverted to the state your computer was in at that period in time. Check to see if the “Unknown hard error” pop-up still appears.
Note: If this doesn’t work by any chance and if you receive an error during any step, let’s try to start System Restore from the Recovery menu because plenty of users who solved their problem via System Restore actually couldn’t start it with Windows loaded.
- On the login screen, click on the Power icon at the bottom right corner and hold the Shift key while clicking restart. This is a great shortcut to accessing the Recovery menu without having to input your recovery DVD.
- Instead or restarting, a blue screen will appear with certain options. Choose Troubleshoot >> Advanced Options >> System Restore and for your computer to open the tool.
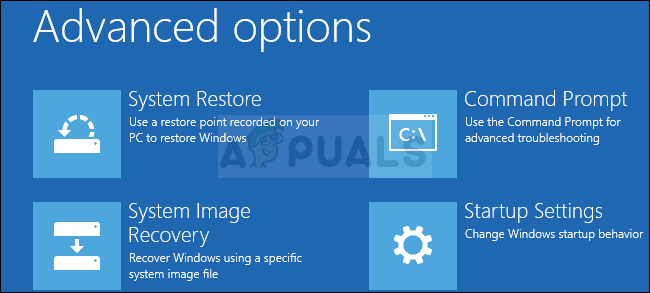
- You should be able to follow the same steps from the second set from the method above (the steps which include restoring your PC). When the process is completed, your computer should boot normally.
The post How to Fix Unknown Hard Error on Windows 7, 8 and 10 appeared first on Appuals.com.


No comments