Fix: Windows Update Service Not Running
This error message appears when users are trying to update their computer using the built-in update functionality or when they are trying to check for updates using either the Settings app on Windows or Control Panel on older versions. The full message actually says: “Windows Update cannot currently check for updates, because the service is not running“.
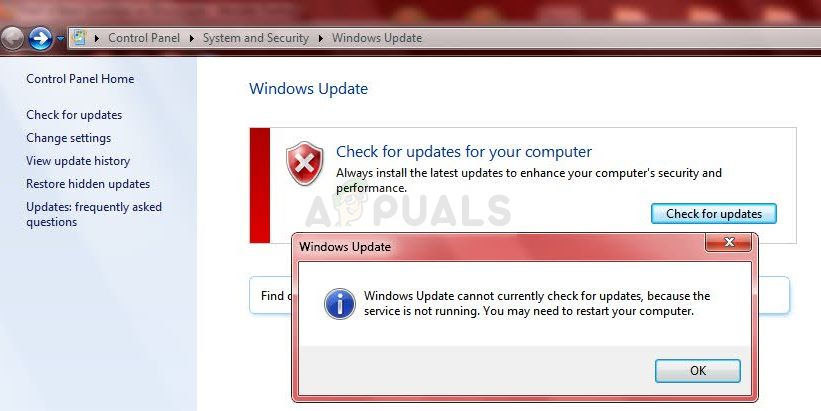
As it goes with other Windows update problems, they can usually be solved with some patience and these problems usually don’t require heavy troubleshooting or resetting your computer. We have prepared some methods which have proven to be useful so make sure you try them out!
Solution 1: Restart the Windows Update Service
Since the error message is quite self-explanatory (unlike most Windows errors), you might as well try to simply restart the Windows Update service which appears to have been stopped or broken. Along with that, you should also delete certain folders which will ensure a proper reset of the service. Good luck!
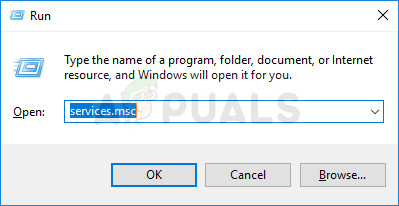
- Open the Run dialog utility by using the Windows Key + R key combination on your keyboard (tap these simultaneously…) Type “services.msc” in the newly opened bar without the quotation marks and click OK in order to open the Services tool.
- The alternative way for the same job is to open Control Panel by locating it in the Start menu. You can also search for it using the Start menu’s search button.
- After the Control Panel opens, change the “View by” setting at the top right part of the window to “Large or Small Icons” and locate the Administrative Tools entry. Click on it and locate the Services shortcut at the bottom by scrolling down. Click on it to open it as well.
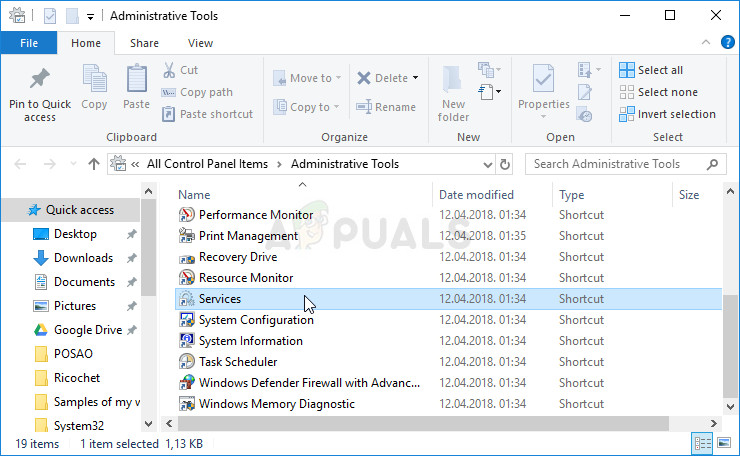
- Locate the Windows Update which is giving you the problem in the services list, right-click on it and select Properties from the menu which appears.
- If the service is started (you can check that just next to the Service status message), you should stop it for now by clicking the Stop button in the middle of the window. If it is stopped, leave it stopped until we proceed.
Now it’s time to delete the folder we have mentioned in the method’s description.
- Open This PC on newer version of Windows or My Computer on older ones depending on the version of Windows you have installed.
- You can navigate there by opening your Windows Explorer interface by clicking the Libraries icon or by opening any folder and clicking on This PC/My Computer at the navigation pane at the left side of the window.
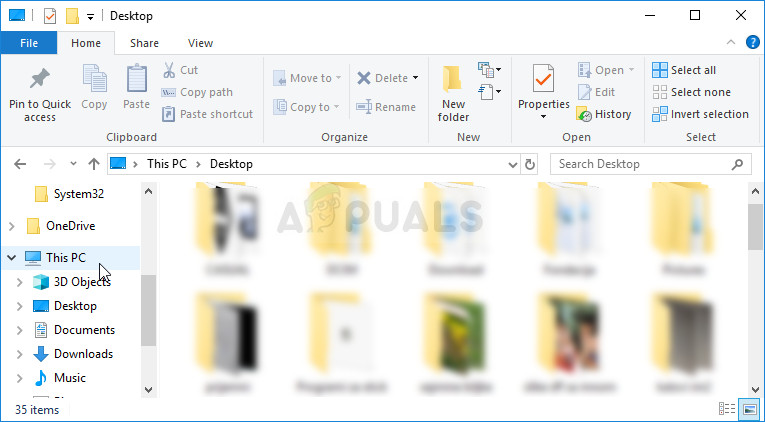
- Double-click on the drive where your operating system is installed (Local Disk C by default) and try to locate the Windows folder. If you can’t see the Windows folder when you open the disk, that is because the hidden files are disabled from being seen on your computer and you will need to enable the view of them.
- Click on the “View” tab on File Explorer’s menu with the disk being the opened path and click on the “Hidden items” checkbox in the Show/hide section. File Explorer will show the hidden files and will keep this option until you change it again.
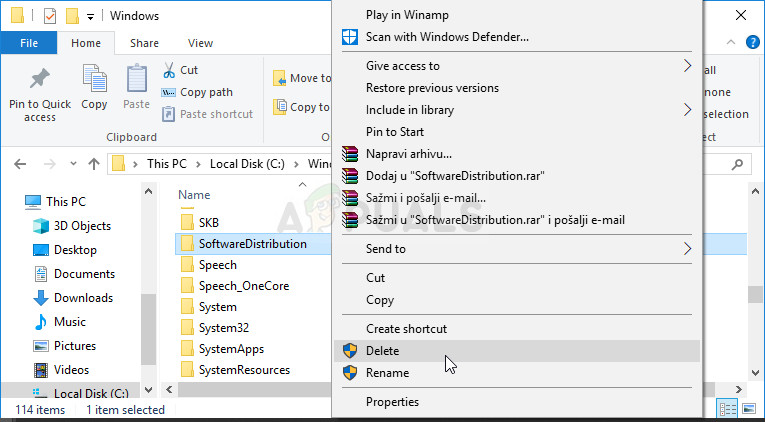
- Locate the SoftwareDistribution folder in the Windows folder, right-click on it, and choose the Delete option from the context menu.
Now it’s time to wrap up this solution and head back to Services in order to start the Windows Update service
- Navigate back to Services, right-click on the Windows Update entry and choose Properties. Make sure that the option under the Startup type menu in the service’s properties window is set to Automatic before you proceed with other steps.
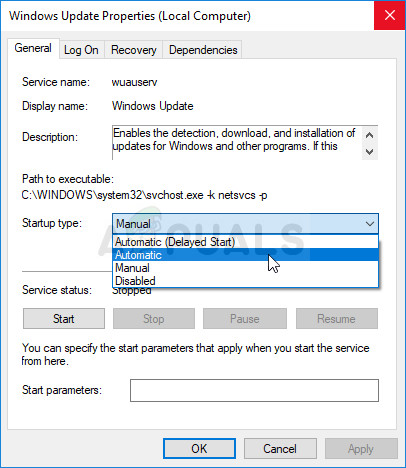
- Confirm any dialogue boxes which may appear when changing the startup type. Click on the Start button at the middle of the window before exiting.
- Check to see if the problem is gone and if you are now able to update Windows properly.
Solution 2: Update the Intel Rapid Storage Technology Driver
One may wonder what does an Intel RST driver has to do with Windows update but apparently this can solve the issue for users who are going through it at the moment. Users have went through trying out more advanced methods but this once can solve the problem in no time!
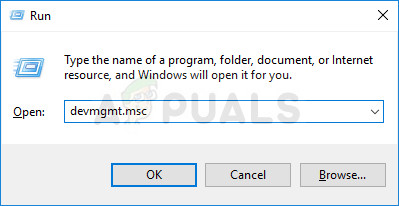
- Click on the Start menu button, type in Device Manager, and select the first result which appears. You can also use the Windows Key + R key combination in order to open the Run dialog box. Type in “devmgmt.msc” in the Run box and click OK in order to run it.
- Expand the Disk drives section by clicking the arrow right next to it and locate the drive which uses the Intel Rapid Storage Technology. Make sure you consult your manufacturer’s website for more info on that. Right-click on that device and choose the Uninstall Device option
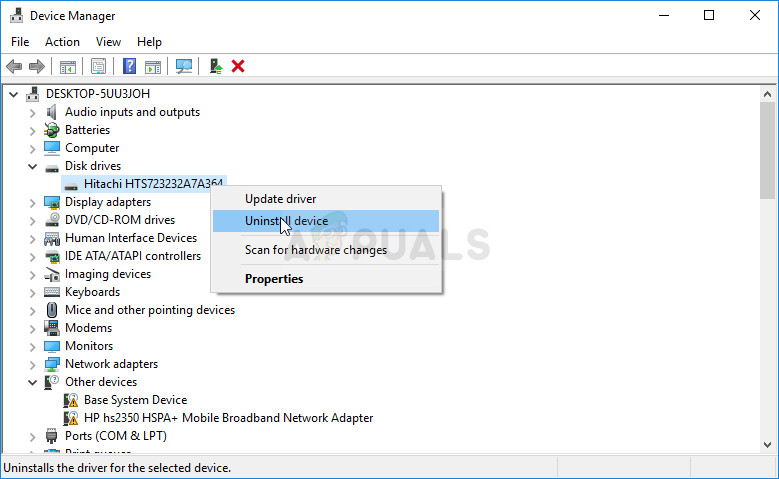
- Confirm any dialogues which may ask you to confirm your choice and wait for the process to finish.
- Look for the Intel Rapid Storage Technology driver by clicking on this link where you should choose the operating system you are using.
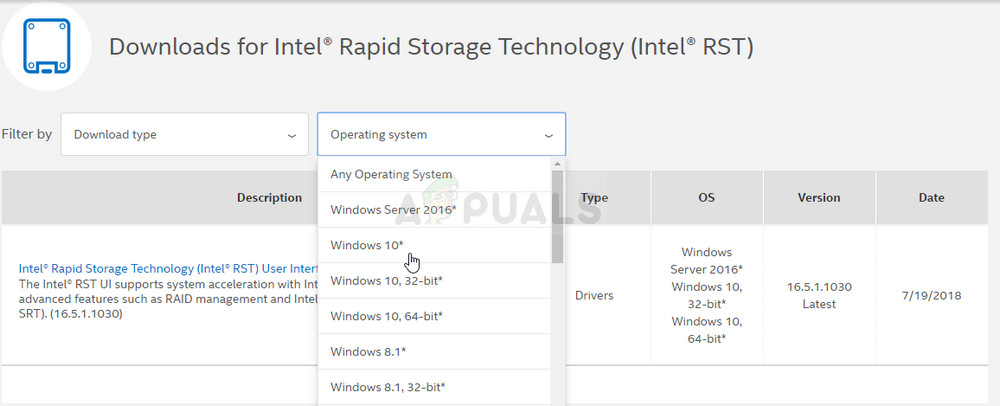
- Download the proper file, save it to your computer, and run it from the Downloads folder. Follow the instruction on-screen in order to install it and restart your computer. Check to see if the problem is solved.
Solution 3: A Method for Older Versions of Windows
If you are running a version of Windows older than Windows 10, you might find yourself lucky enough to see that updates can be managed more easily than on Windows 10. For example, you can simply choose whether to install updates at all or not and that is exactly what we are going to do in order to solve the problem.
If the error message appears when you are trying to check for updates, this might just work.
- Click on the Start menu button and open Control Panel by searching for it. You can also locate Control Panel in the Start menu directly on Windows 7.
- In Control Panel, set the View as option to Large Icons at the top right corner and click on Windows update.
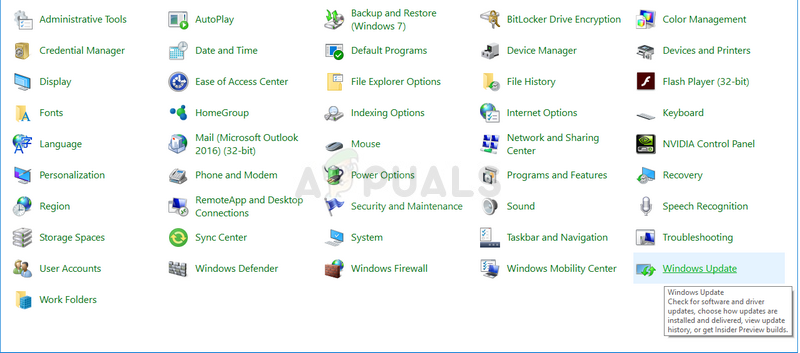
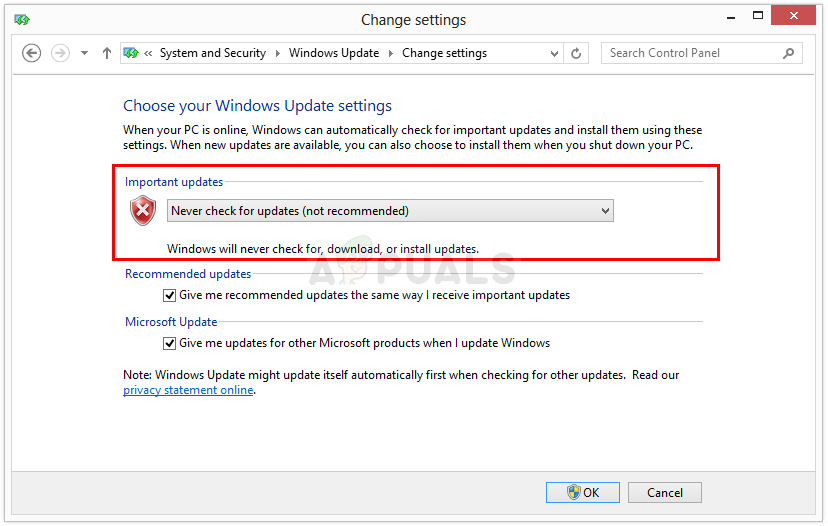
- At the left side of the screen at the list of various settings, click on Change settings and look under the Important updates section. Click on the dropdown list and choose the Never check for updates (not recommended) option.
- After that, head back to the Windows Update section in Control Panel and locate the Check for updates option just above the Change settings option you have opened at the left side navigation menu.
- Check to see if you are able to install the updates now. Don’t forget to revert the changes you have made after the update is successfully installed.
Solution 4: Reregister these Windows Update Files
These files are one of the core .dll files responsible for the Windows Update service and you should try to reregister them using an administrative Command Prompt. This solution should take more than a minute and it has helped users across various operating systems!
- Search for “Command Prompt” either right in the Start menu (just start typing) or by tapping the search button right next to it and typing then. Right-click on the first result at the top of the window and select the “Run as administrator” option.
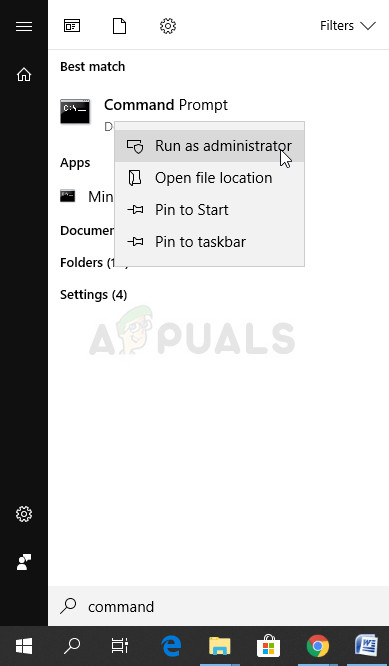
- Users who are using an older version of Windows (older than Windows 10) can use the Windows Logo Key + R key combination in order to open the Run dialog box. Type in “cmd” in this box and use the Ctrl + Shift + Enter key combination in order to run Command Prompt with admin privileges.
- Copy and paste the commands displayed below and make sure you click the Enter key on your keyboard after typing each one:
regsvr32 wuapi.dll
regsvr32 wuaueng.dll
regsvr32 wups.dll
regsvr32 wups2.dll
regsvr32 wuwebv.dll
regsvr32 wucltux.dll
- Type “exit” in Command Prompt, restart your computer, and try checking for updates once again to see if it works now.
The post Fix: Windows Update Service Not Running appeared first on Appuals.com.


No comments