How to Fix Error 1067: ‘The process terminated unexpectedly’
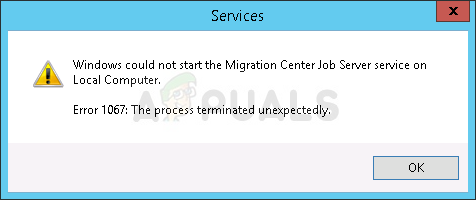
The error 1067 can occur with various Windows service and the message usually appears when you are trying to execute an action which would usually cause a service to start. The most common occurrence for this error message would be the SQL service and service similar to it.
There are quite a few methods which can be used to solve this problem and we have chosen several methods which have proven to be successful for other users who experienced the same problem. Follow the methods below and good luck!
Solution 1: Take Control of the Service
This problem is usually related to various permissions and it can be solved by giving your personal user profile the access to the service controls. This method should be your number one priority because of several reasons.
First of all, it’s universal and it can be applied no matter which service displays the error 1067 message. Second of all, it’s easy to do it and the changes can be reverted in no time.
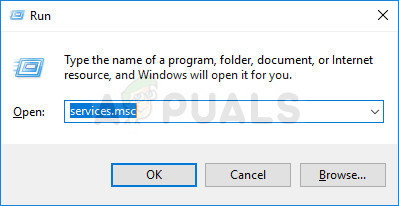
- Open the Run utility by using the Windows Key + R key combination on your keyboard (press these keys at the same time.. Type “services.msc” in the newly opened box without the quotation marks and click OK in order to open the Services tool.
- The alternative way is to open Control Panel by locating it in the Start menu. You can also search for it using the Start menu’s search button.
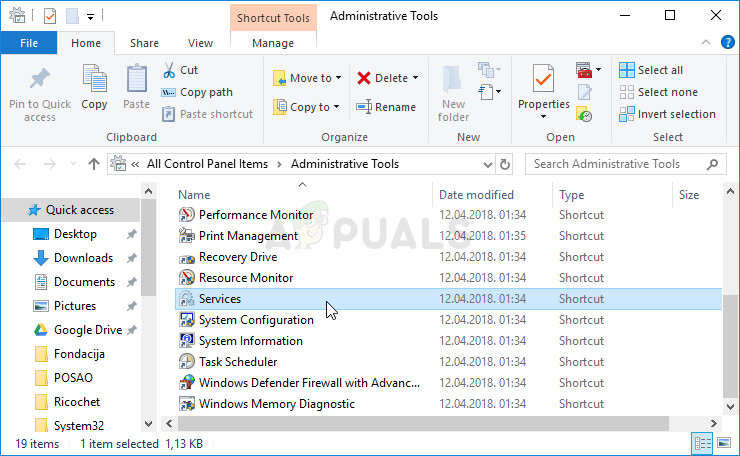
- After the Control Panel window opens, change the “View by” option at the top right part of the window to “Large Icons” and scroll down until you locate the Administrative Tools entry. Click on it and locate the Services shortcut at the bottom. Click on it to open it as well.
- Locate the service which is giving you the error in the services list, right-click on it and select Properties from the context menu which appears.
- If the service is started (you can check that just next to the Service status message), you should stop it for now by clicking the Stop button in the middle of the window. If it is stopped, leave it stopped until we proceed. Navigate to the Log On tab and click on the Browse… button.
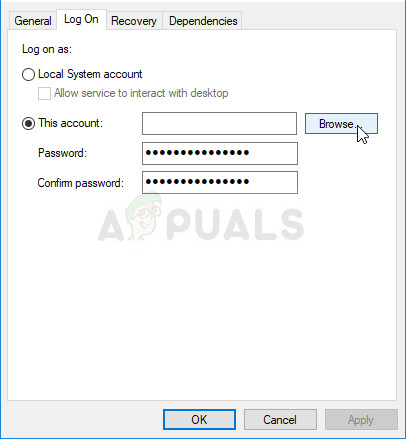
- Under the “Enter the object name to select” entry box, type in your account’s name, click on Check Names and wait for the name to become available.
- Click OK when you are finished and type in the password in the Password box when you are prompted with it, if you have setup a password. It should now start without issues!
Solution 2: Reinstall the Problematic Service
This method can also be used to solve the error 1067 with any problematic service as long as it can be deleted via the registry editor. This is a more advanced way of restarting a service which has gone corrupt and which can’t be fixed simply by resetting it in Services.
- Since you are going to delete a registry key, we recommend you check out this article we have published for you to safely backup your registry to prevent other problems. Still, nothing wrong will occur if you follow the steps carefully and correctly.
- Open the Registry Editor window by typing “regedit” in either the search bar or the Run dialog box which can be opened with the Windows Key + R key combination. Navigate to the following key in your registry by navigating in the left pane:
HKEY_LOCAL_MACHINE\SYSTEM\CurrentControlSet\Services
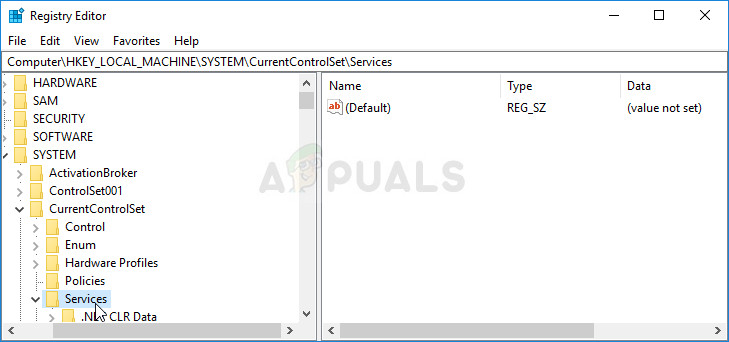
- In the Services key opened, locate the problematic service key, right-click on it, and choose the Delete option. Confirm any pending dialogues and restart your computer afterwards.
Note: If you are not able to delete this key, you might need to add extra access to your user account. This can be done while still in Registry Editor.
- Right-click the problematic service’s key at the left navigation pane and choose the Permissions option from the context menu.
- Under the Group or user names option, try to locate your computer’s username on the list. If you can’t find it, click on Add >> Advanced >> Find Now. You should be able to see your user account in the Search results so choose it and click OK twice until you back in the Permissions folder.
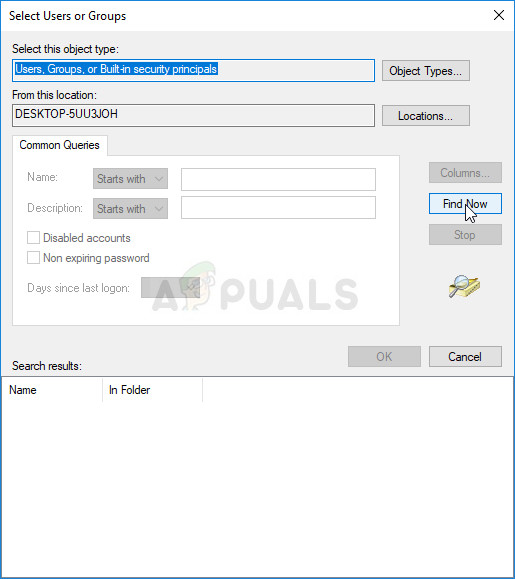
- Select you account in the Group or user names section and check the Full Control checkbox under Permissions for (YourUsername) and apply the changes you have made.
- After that, you can try and delete the key again. Restart your computer afterwards.
- After the restart, follow the instructions in this article in order to run a SFC scan which should help you locate the deleted service from the registry and bring it back easily. Check to see if the problem has disappeared.
Solution 3: Delete Certain Files
If the error 1067 is related to the MySQL Service on your computer, there are quite a few methods which can be used to solve the problem. The first one might be the easiest and it requires that you stop the MySQL service and delete a couple of log files in the install directory.
- Open Control Panel by locating it in the Start menu. You can also search for it using the Start menu’s search button.
- After the Control Panel window opens, change the “View by” option at the top right part of the window to “Large Icons” and scroll down until you locate the Administrative Tools entry. Click on it and locate the Services shortcut at the bottom. Click on it to open it as well.

- Locate the MySQL service which in the services list, right-click on it and select Properties from the context menu which appears. At the middle of the window, click on Stop and click OK.
- Navigate to the folder where you have installed MySQL. It’s usually either the C >> Program Files or the C >> Program Files (x86) folder. Open the folder and double-click on the “data” folder inside.
- Locate the two files called ib_logfile0 and ib_logfile1, right-click on both of them, and choose the Delete option from the context menu.
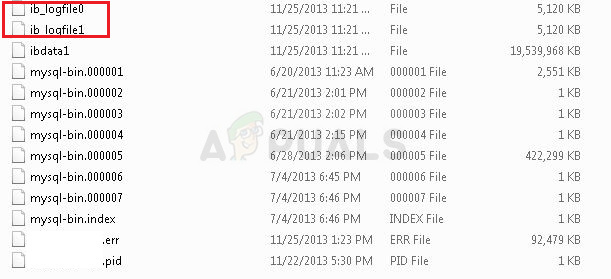
- Head back to the Services window, open the Properties of the MySQL service, and click the Start button. Check to see if the problem is gone.
Solution 4: Tweak MySQL Configuration Files
This MySQL configuration file is called “my.ini” and there is an option inside it which is known to cause this problem. You can either delete it or set it to disabled but, either way, you should definitely consider this method if the error 1067 is occurring with MySQL.
- Navigate to the root folder where you have installed MySQL. It’s usually either the C >> Program Files or the C >> Program Files (x86) path. Open the folder and try to locate the “my.ini” file.
- Right click on the located file and choose the Open with… Notepad option is the default program meant to open it isn’t already Notepad.
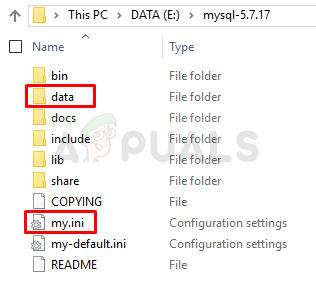
- Inside, you should see a list of various commands and options. Use the Ctrl + F key combination or click on Edit at the top menu and choose Find.
- Type in “innodb_flush_method” and check to see if there are any search results. If there is, make sure you set it to normal:
innodb_flush_method=normal
- If such a command doesn’t exist, you can add it to the bottom of the “my.ini” file by pasting the text above. Make sure you save the changes using Ctrl + S key combination and restart your computer afterwards. Check to see if the problem is gone.
The second configuration file which should be edited if the process above has failed to solve your problem is the “my-default.ini” file. This method is useful if the directory folders were messed up after an update.
- In the same root folder where you navigated to before, locate and open “my-default.ini” file.
- Right click on it and choose the Open with… Notepad option is the default program meant to open it isn’t already Notepad.
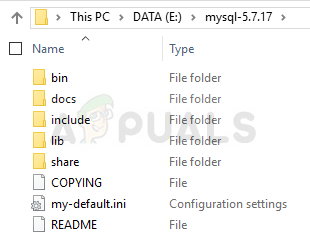
- Under the “[mysqld]” line in the file, make sure everything looks as it does in this article, below this line. If certain options are missing add them but you should edit the existing ones.
basedir="Full path to the install location of MySql (the folder where you are currently located)"
datadir="The same path but with the data folder opened; e.g. C:\MySql\data"
port=3306
server-id=1
bind-address=127.0.0.1
- Use the Ctrl + S key combination in order to save the changes and restart your computer in order to apply them. Check to see if the problem is gone now.
Solution 5: Reinstall SQL Server
This method appeals to SQL Server users which is another tool which deals with databases It’s time to perform a clean install of the program as that should solve the problem immediately. A clean install is absolutely needed if you definitely want to get rid of all files since sometimes even the temporary files can cause this problem.
- First of all, make sure you have logged in with an admin account as you won’t be able to uninstall SQL Server if you are not an admin.
- Make sure you create backups of the databases you want to preserve since this process will delete them.
- Click on the Start menu and open Control Panel by searching for it and clicking it. Alternatively, you can click on the gear icon in order to open Settings if you are running Window 10
- In Control Panel, select the View as: Category option at the top right corner and click on Uninstall a Program under the Programs section.
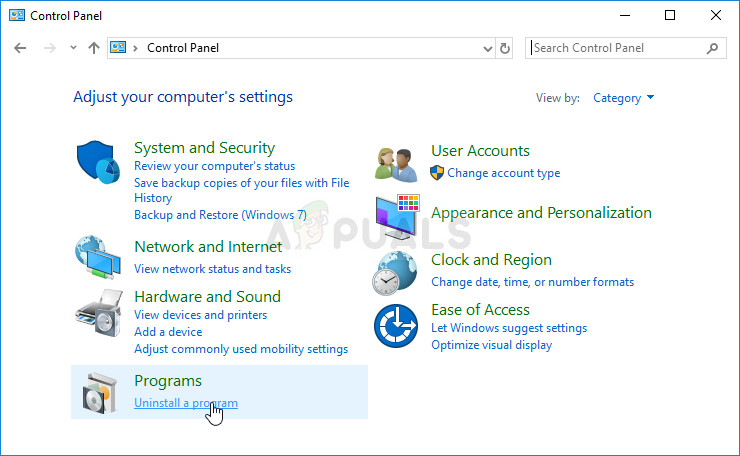
- If you are using the Settings app, clicking on Apps should open a list of all installed apps and programs on your computer.
- Locate the SQL Server entry on the list and click on it. Click on the Uninstall button above the list and confirm any dialogs which may appear. Follow the instructions on-screen in order to uninstall SQL Server and make sure you restart your computer afterwards.
After this, you will need to delete Spotify’s registry data left behind on your computer by following the set of steps below:
- Open the Registry Editor window by typing “regedit” in either the search bar or the Run dialog box which can be opened with the Windows Key + R key combination. Locate and delete the following keys in the Registry:
HKEY_LOCAL_MACHINE\SOFTWARE\Microsoft\Microsoft SQL Server
HKEY_LOCAL_MACHINE\SOFTWARE\Microsoft\MSSQLServer
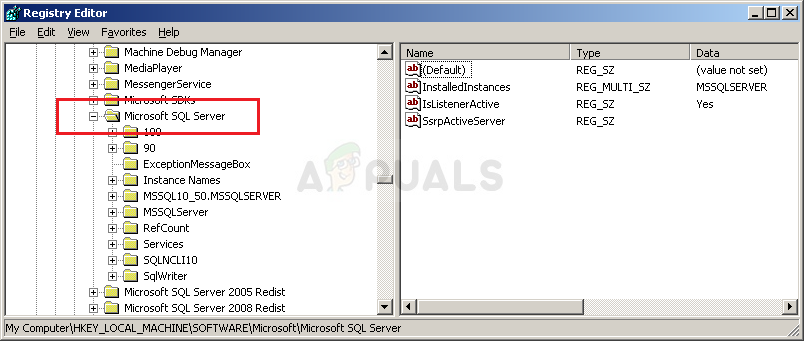
- After that, navigate to following location in the registry and delete all keys which reference SQL Server:
HKEY_LOCAL_MACHINE\SOFTWARE\Microsoft\Windows\CurrentVersion\Uninstall
HKEY_LOCAL_MACHINE\SYSTEM\CurrentControlSet\Services
- Search for SQL on your computer and rename all folders referencing it. Restart your computer after you have performed these steps.
- Navigate to this link in order to download the SQL tool you have installed, save the file to your computer, and run it. Follow the steps below in order to install it and check to see if the problem is still there.
Solution 6: Method for EAServer Windows Service
If the error 1067 appears when the EAServer service is about to start, you can fix it with this method without much problems. It only involved editing a registry key representing the name of the service which might have gone corrupt in a recent period, possibly after an update of either your operating system or the program you are using.
We hope you still have your registry backup ready and that you have made it way back in the first solution!
- Open the Registry Editor window by typing “regedit” in either the search bar or the Run dialog box which can be opened with the Windows Key + R key combination. Navigate to the following key in your registry by navigating in the left pane:
HKEY_LOCAL_MACHINE\SYSTEM\CurrentControlSet\Services

- Try to locate the EAServer entry in the list under Services and click on it once to open its list of related registry keys.
- Locate the SERVERNAME key, right-click on it, and choose the Modify option. Under the Value data bar, make sure you type EAServer and apply the changes. Check to see if the problem is gone.
The post How to Fix Error 1067: ‘The process terminated unexpectedly’ appeared first on Appuals.com.


No comments